Raising Canes Bread
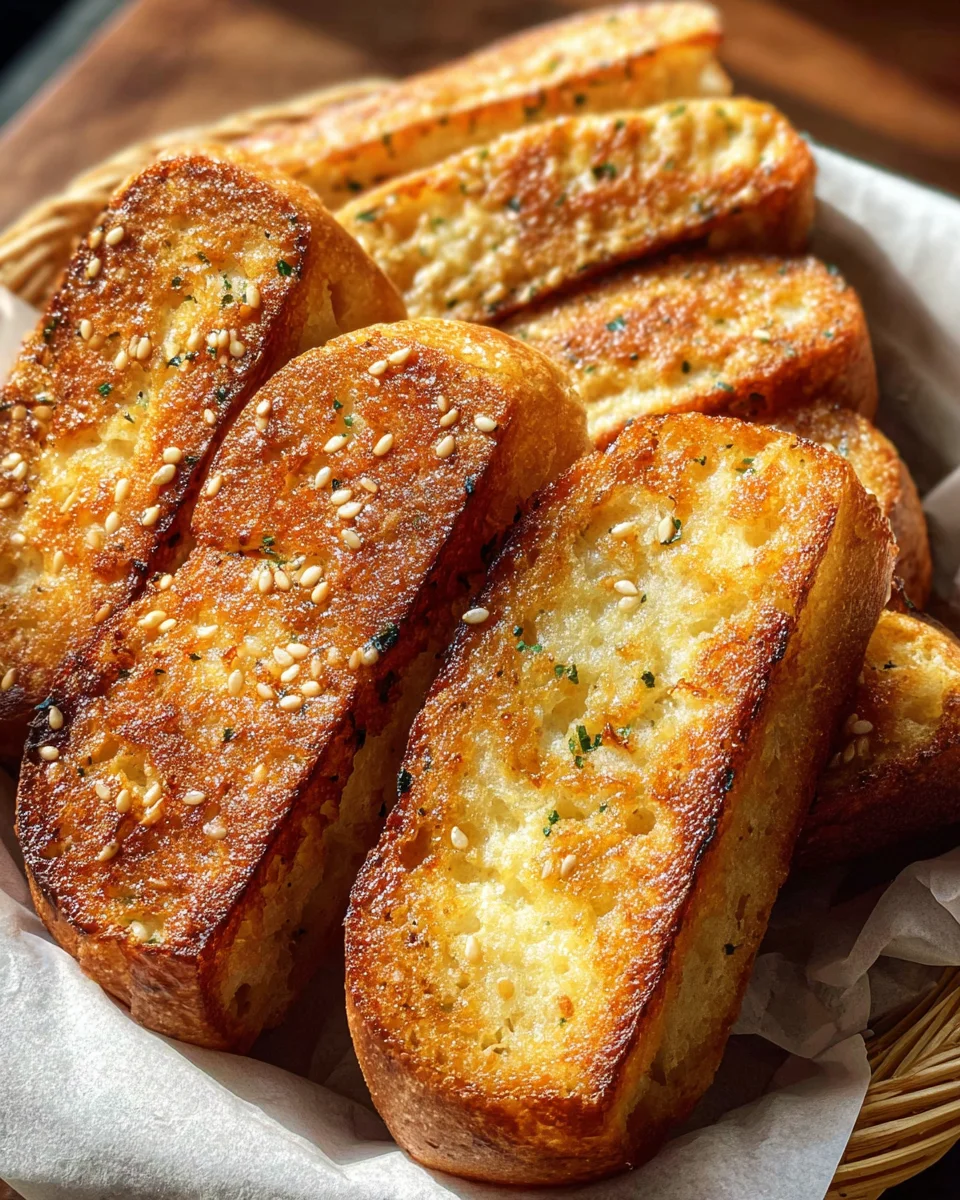
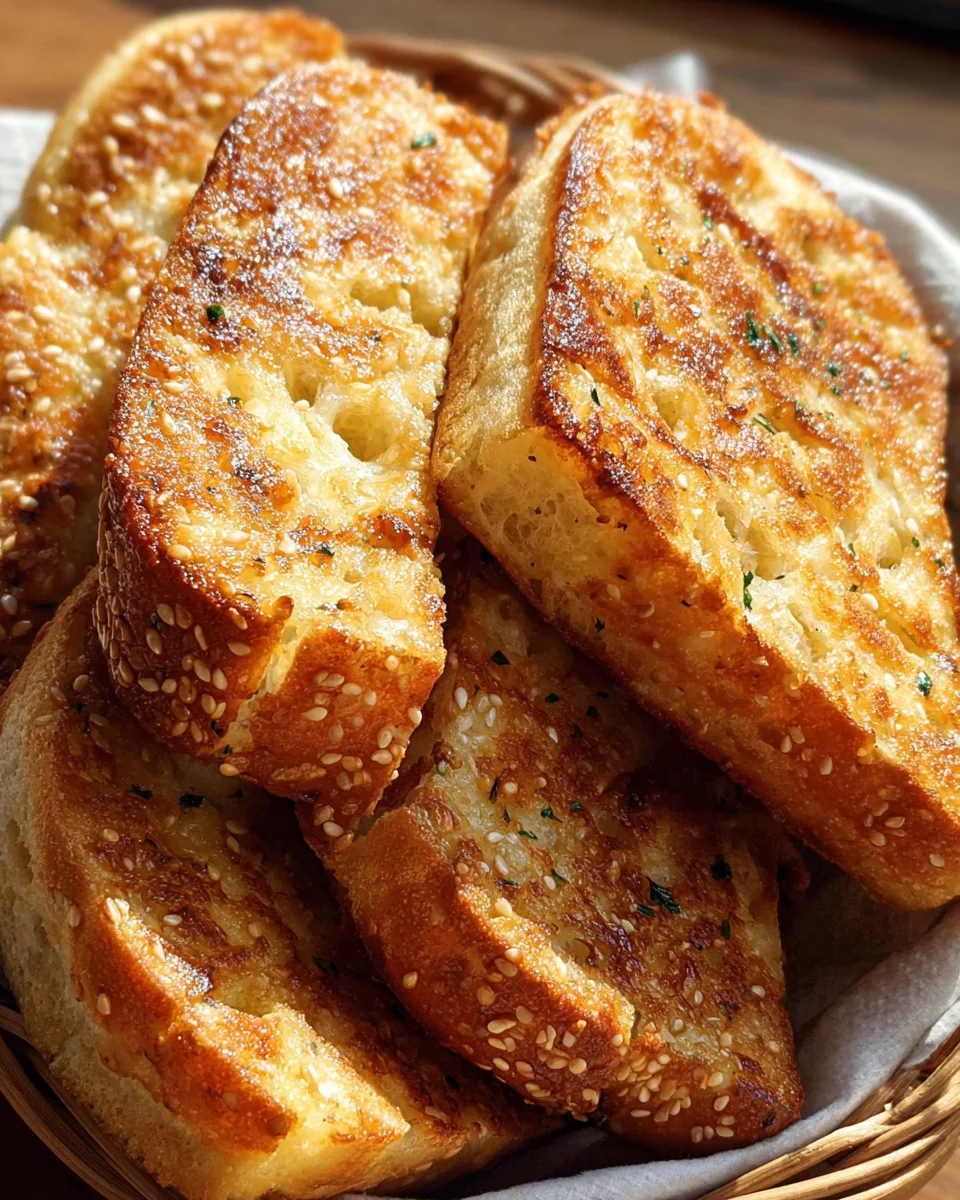
Homemade Raising Canes Bread is the perfect side for any meal, adding a delicious garlicky flavor that enhances your dining experience. This easy-to-make garlic bread is not only reminiscent of the popular fast-food chain but also ideal for gatherings, BBQs, or simply as a comforting snack. With just a few ingredients and minimal preparation time, you’ll find yourself reaching for this recipe time and again.
Why You’ll Love This Recipe
- Quick and Easy: This recipe takes only 5 minutes from start to finish, making it perfect for busy weeknights.
- Delicious Flavor: The combination of garlic salt and butter on BBQ sesame bread creates a mouthwatering taste that complements any dish.
- Versatile Side: Whether you’re serving pasta, grilled meats, or salads, this garlic bread pairs well with various cuisines.
- Copycat Delight: Enjoy homemade garlic bread that captures the essence of Raising Canes without leaving your kitchen.
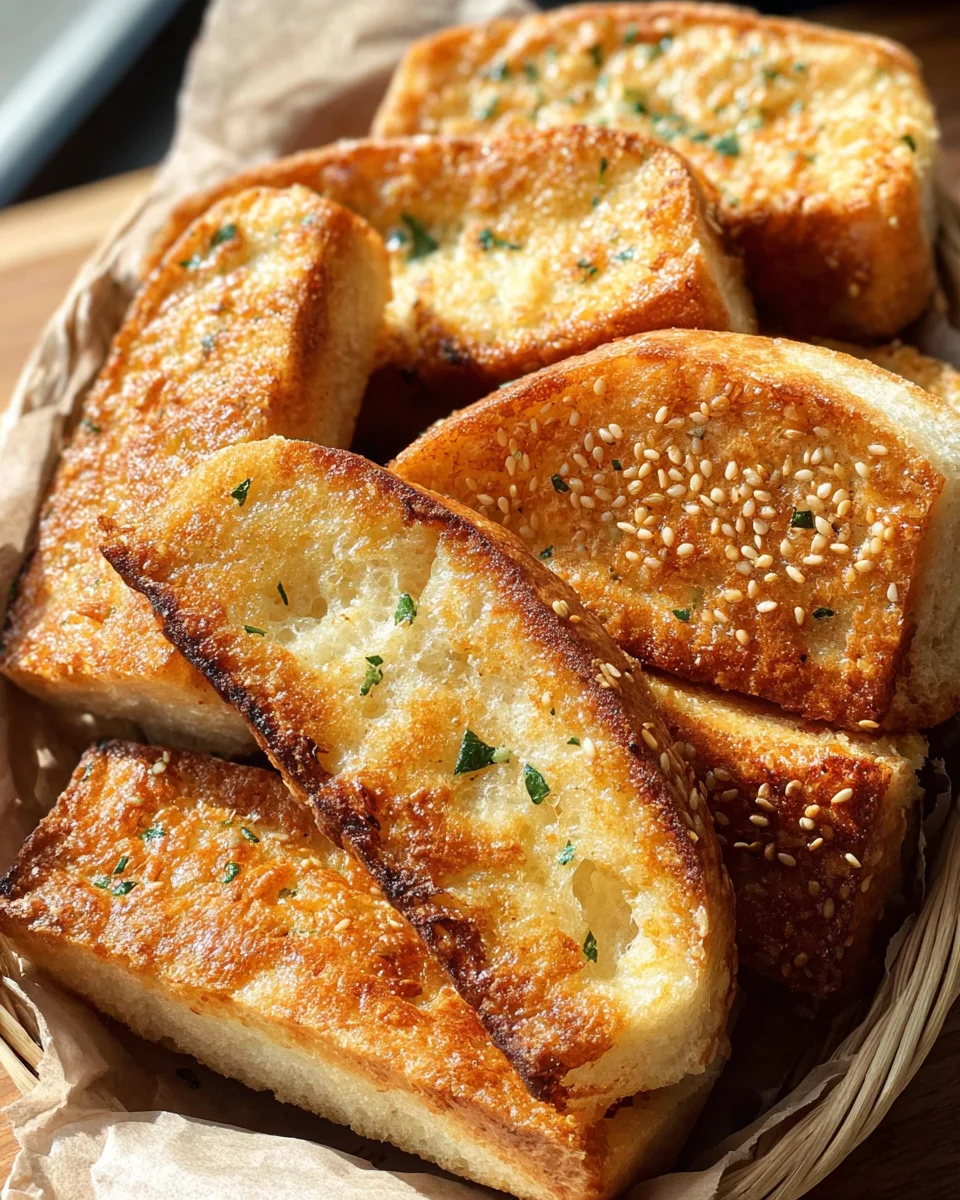
- Impressive Presentation: Crispy on the outside and soft inside, this garlic bread looks great on any dinner table.
Tools and Preparation
To make Raising Canes Bread successfully, you’ll need some essential tools. Having the right equipment ensures your cooking process is smooth and efficient.
Essential Tools and Equipment
- Cast-iron skillet
- Small mixing bowl
- Spatula
- Butter knife
Importance of Each Tool
- Cast-iron skillet: Ideal for achieving the perfect sear and crispy texture on your garlic bread.
- Small mixing bowl: Perfect for easily combining ingredients without creating a mess.
Ingredients
For this delectable homemade garlic bread, you will need:
For the Garlic Spread
- 4 tablespoons unsalted butter (softened)
- 1 teaspoon garlic salt
For the Bread
- 4 slices BBQ sesame bread
How to Make Raising Canes Bread
Step 1: Prepare the Garlic Spread
- In a small mixing bowl, combine the softened butter and garlic salt.
- Mix them together until well blended.
Step 2: Spread the Mixture on Bread
- Use a butter knife to spread the garlic mixture generously over each slice of BBQ sesame bread, ensuring even coverage.
Step 3: Heat the Skillet
- Preheat your cast-iron skillet over medium-high heat for about 2 minutes.
Step 4: Sear the Bread
- Place each slice of bread in the skillet with the butter side down.
- Sear for about 2 minutes or until it starts to brown nicely.
Step 5: Serve and Enjoy
- Once browned, remove the slices from the skillet using a spatula.
- Serve warm with your favorite dishes or enjoy as a snack!
With these simple steps, you can create delicious Raising Canes Bread that everyone will love!
How to Serve Raising Canes Bread
Raising Canes Bread is a delightful addition to any meal, offering a savory, garlicky flavor that complements many dishes. Here are some serving suggestions to enhance your dining experience.
With Fried Chicken
- Enjoy the bread alongside crispy fried chicken for a classic pairing. The buttery garlic flavor enhances the dish’s richness.
As a Sandwich Base
- Use slices of Raising Canes Bread as a base for sandwiches. Its sturdy texture holds up well against fillings like grilled veggies or meats.
With Dips
- Serve the garlic bread with your favorite dips, such as marinara or ranch dressing. It’s perfect for scooping and adds an extra layer of flavor.
As a Snack
- Cut the bread into smaller pieces for a quick snack. They can be enjoyed plain or with spreads like hummus or cheese.
At Barbecues
- Incorporate the bread into your next barbecue. It pairs wonderfully with grilled meats and can soak up delicious sauces.
How to Perfect Raising Canes Bread
Perfecting Raising Canes Bread takes just a few simple tips to ensure it reaches its full potential. Here are some ways to enhance this tasty treat.
- Use fresh ingredients: Fresh butter and garlic salt will elevate the flavor significantly.
- Preheat your skillet: Ensuring your skillet is hot enough will give you that perfect crispy texture.
- Don’t overcrowd the pan: Cook in batches if needed, as this will ensure each slice gets evenly browned.
- Experiment with toppings: Feel free to add herbs like parsley or basil for an extra burst of flavor.
- Serve immediately: For the best taste and texture, serve the garlic bread right after cooking.
Best Side Dishes for Raising Canes Bread
When enjoying Raising Canes Bread, pairing it with complementary side dishes can make your meal even more satisfying. Here are some excellent options to consider:
- Coleslaw: This crunchy side adds freshness and balances the richness of the garlic bread.
- Potato Wedges: Crispy potato wedges offer a hearty option that pairs well with any meal.
- Macaroni and Cheese: Creamy mac and cheese makes for a comforting side that complements the flavors perfectly.
- Grilled Vegetables: A colorful assortment of grilled veggies adds healthiness and vibrant flavors to your plate.
- Caesar Salad: Crisp romaine lettuce with tangy dressing provides a refreshing contrast to the savory bread.
- Corn on the Cob: Sweet corn provides a fun, seasonal touch that goes well with barbecue meals.
- Baked Beans: Hearty baked beans are sweet and savory, making them an ideal match for Raising Canes Bread.
- Fried Pickles: These tangy treats bring an exciting crunch and flavor contrast that everyone will love.
Common Mistakes to Avoid
Making Raising Canes Bread at home can be fun, but there are common mistakes to watch out for.
- Preparation: Not mixing garlic salt thoroughly with the butter can lead to uneven flavor. Ensure you blend them well for a consistent taste.
- Heat Control: Using too high heat can burn the bread quickly. Keep it at medium-high heat and watch closely for the perfect browning.
- Skillet Selection: Forgetting to use a well-seasoned cast-iron skillet may result in sticking. Always preheat and ensure your skillet is ready before adding bread.
- Slicing Thickness: Cutting the bread too thick can prevent it from toasting evenly. Aim for even slices around 1 inch thick for best results.
- Butter Application: Skipping butter on one side of the bread can lead to dryness. Make sure both sides are coated for maximum flavor and moisture.
Storage & Reheating Instructions
Refrigerator Storage
- Store in an airtight container for up to 3 days.
- Place parchment paper between slices if stacking to avoid sticking.
Freezing Raising Canes Bread
- Wrap each slice tightly in plastic wrap or foil.
- Store in a freezer-safe bag for up to 2 months.
Reheating Raising Canes Bread
- Oven: Preheat to 350°F (175°C) and bake for about 5 minutes until warm.
- Microwave: Heat on medium power for 20-30 seconds. Be careful not to overheat as it may become tough.
- Stovetop: Sear again in a skillet over low heat, flipping after a minute until warmed through.
Frequently Asked Questions
Here are some frequently asked questions about Raising Canes Bread.
How To Make Raising Canes Garlic Bread?
To make Raising Canes Garlic Bread, mix softened butter with garlic salt and spread it on BBQ sesame bread, then sear in a skillet.
Can I Use Other Types of Bread for Raising Canes Toast?
Yes, you can substitute other breads like Texas toast or French bread. Just adjust cooking time as needed.
How Long Does Raising Canes Bread Last?
Raising Canes Bread lasts about 3 days in the refrigerator or up to 2 months if frozen properly.
What Dishes Pair Well With Raising Canes Garlic Bread?
Raising Canes Garlic Bread pairs great with pasta dishes, salads, or as a side with grilled meats.
Is There a Vegan Option for Raising Canes Bread?
You can use vegan butter instead of regular butter to make a delicious vegan version of Raising Canes Bread.
Final Thoughts
Raising Canes Bread is an easy and delightful addition to any meal. Its buttery garlic flavor makes it perfect for various dishes or just as a snack. Feel free to customize it with herbs or spices according to your taste!

Raising Canes Bread
- Total Time: 10 minutes
- Yield: Serves 4
Description
Indulge in the delightful flavors of homemade Raising Canes Bread, a quick and easy garlic bread recipe that’s perfect for any meal. This savory treat features the rich combination of garlic salt and butter generously spread over BBQ sesame bread, giving you a crispy exterior and a soft, flavorful interior. Whether served alongside fried chicken, as a base for sandwiches, or enjoyed as a comforting snack, this recipe is sure to elevate your dining experience. With minimal ingredients and preparation time, it’s a go-to favorite for gatherings, BBQs, or simply satisfying your cravings at home.
Ingredients
- 4 tablespoons unsalted butter (softened)
- 1 teaspoon garlic salt
- 4 slices BBQ sesame bread
Instructions
- In a small mixing bowl, combine softened butter and garlic salt until well blended.
- Generously spread the garlic mixture over each slice of BBQ sesame bread.
- Preheat a cast-iron skillet over medium-high heat for about 2 minutes.
- Place each slice in the skillet with the butter side down and sear for about 2 minutes until golden brown.
- Remove from skillet and serve warm with your favorite dishes or enjoy as is!
- Prep Time: 5 minutes
- Cook Time: 5 minutes
- Category: Side Dish
- Method: Searing
- Cuisine: American
Nutrition
- Serving Size: 1 slice (50g)
- Calories: 180
- Sugar: 0g
- Sodium: 270mg
- Fat: 10g
- Saturated Fat: 6g
- Unsaturated Fat: 4g
- Trans Fat: 0g
- Carbohydrates: 21g
- Fiber: 1g
- Protein: 4g
- Cholesterol: 20mg

