Cheeseburger Sliders
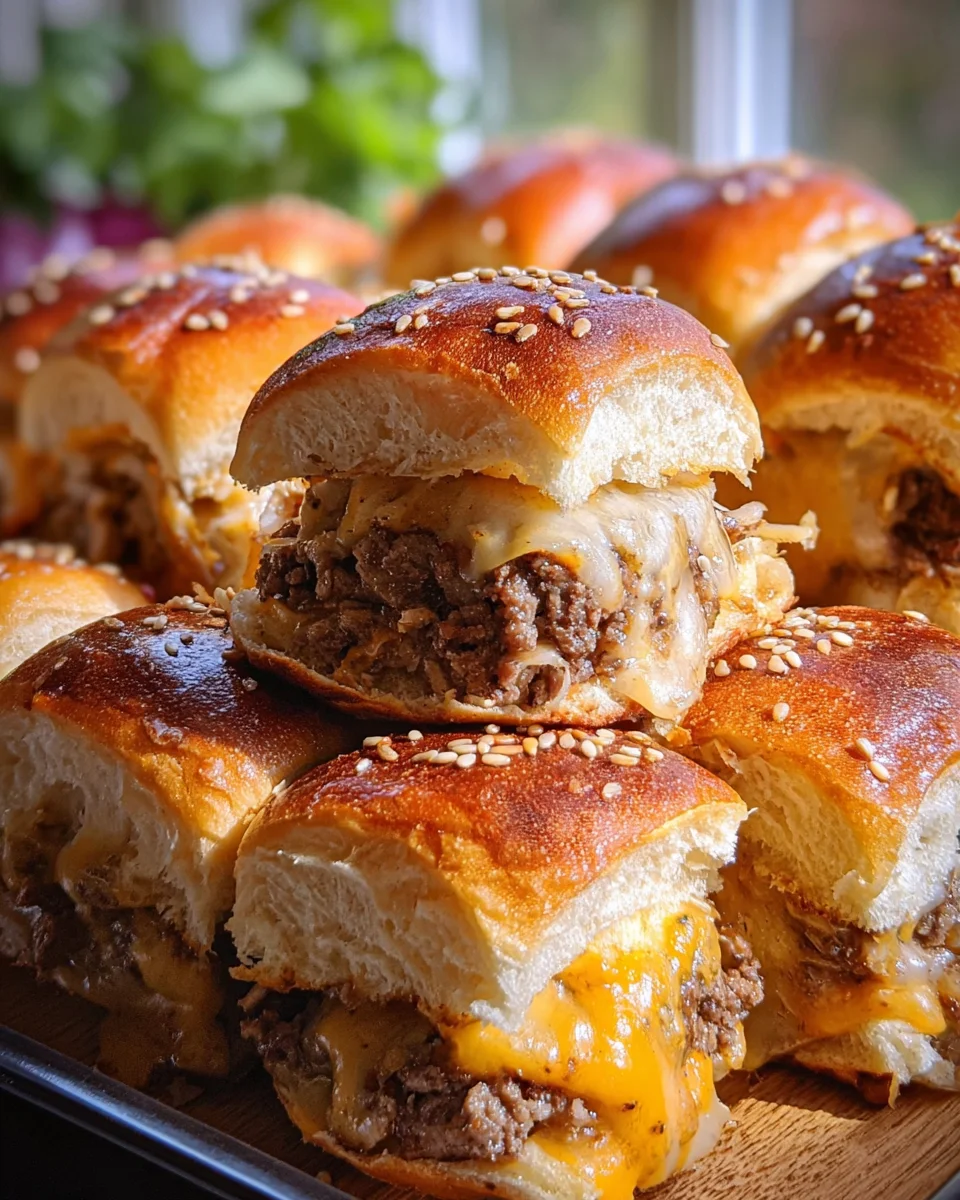
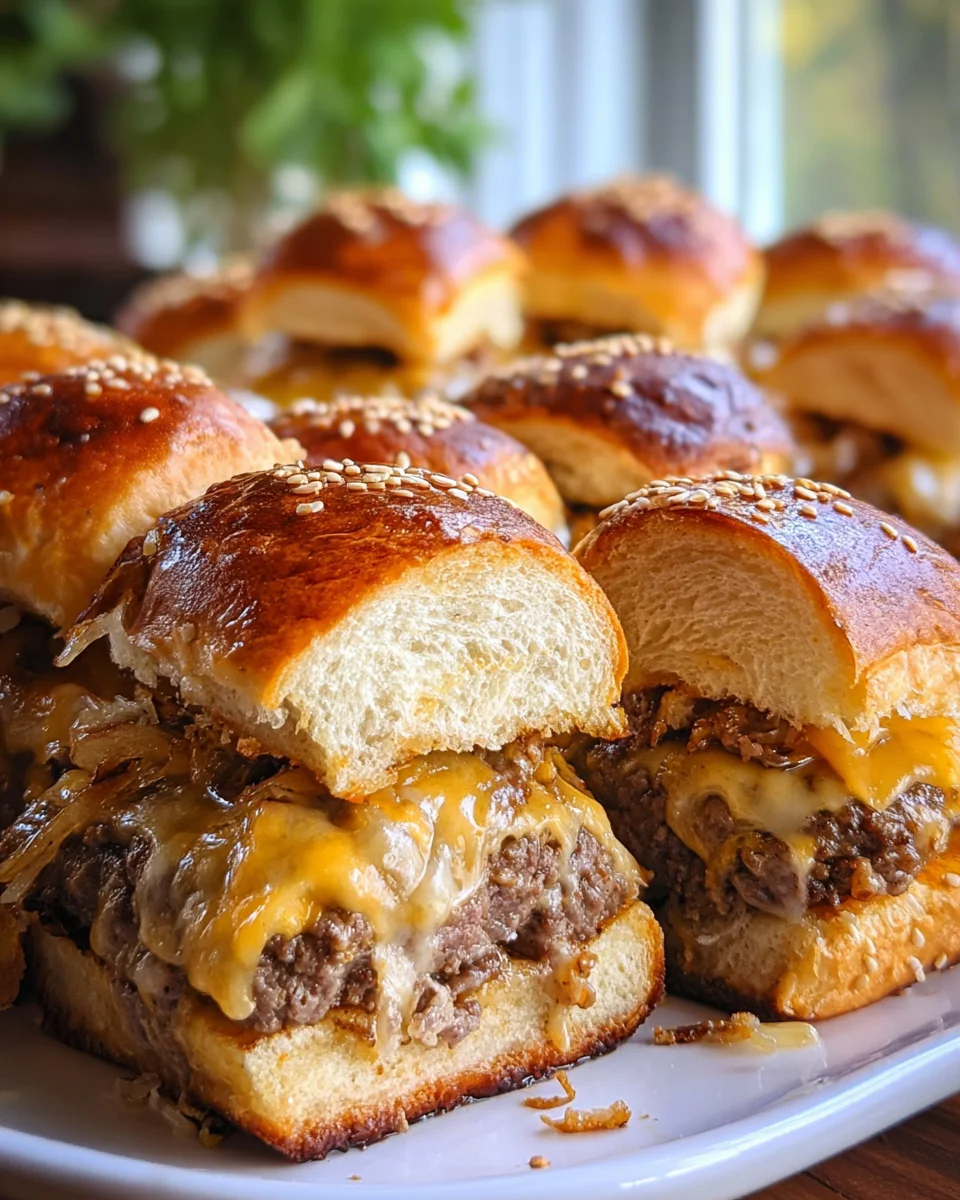
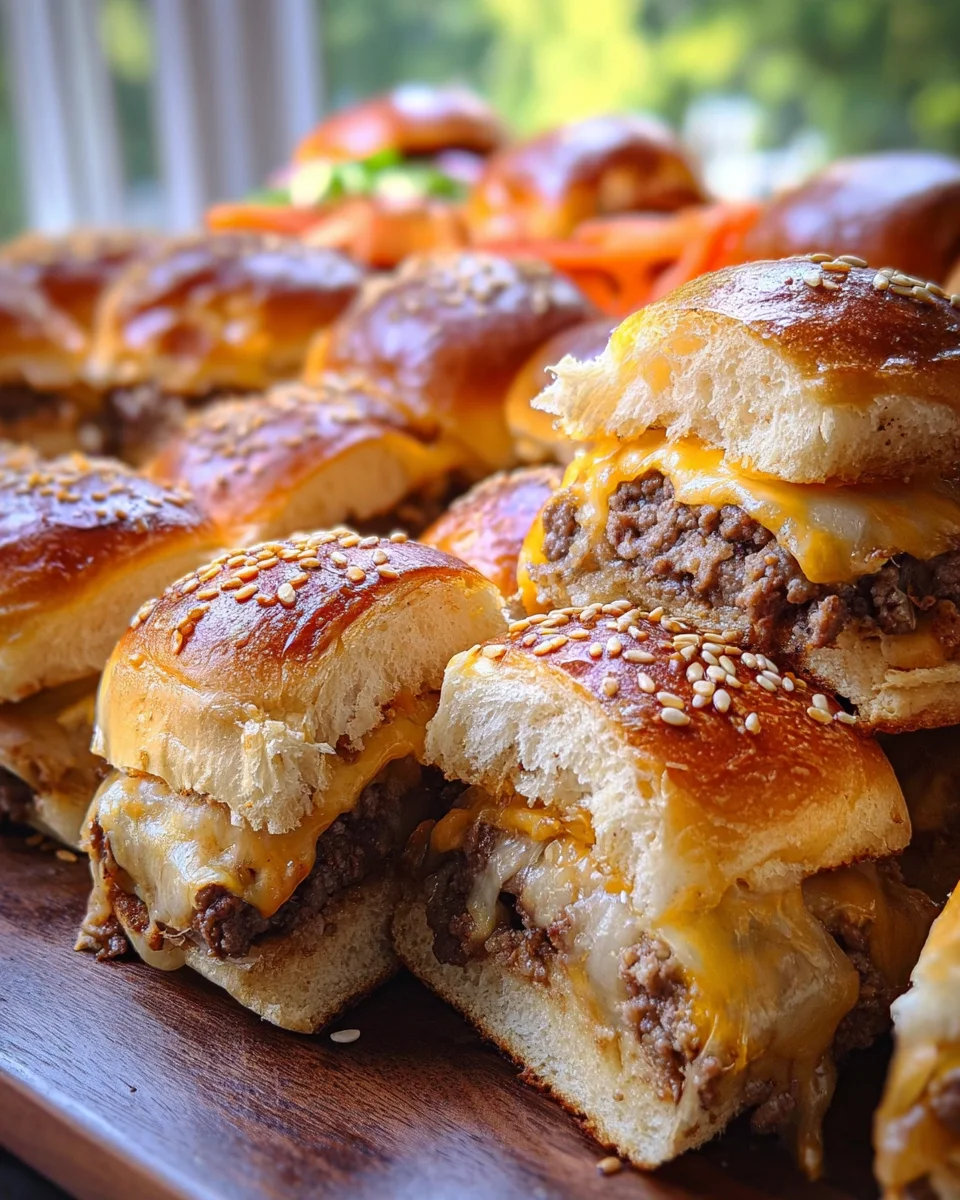
These Cheeseburger Sliders are not just a simple dish; they’re a delightful blend of flavors that make them perfect for any gathering. Whether you’re hosting a party, celebrating a birthday, or just enjoying game day with friends, these sliders will surely impress your guests. With juicy ground beef and gooey cheese, each bite is an explosion of flavor. Plus, they’re easy to make and disappear quickly!
Why You’ll Love This Recipe
- Quick and Easy: These sliders come together in just 20 minutes, making them a hassle-free option for busy days.
- Crowd-Pleaser: Perfect for parties and gatherings, everyone loves cheeseburgers, especially in slider form!
- Customizable: Feel free to add your favorite toppings like pickles or jalapeños to personalize your sliders.
- Savory Sauce: The homemade burger sauce elevates the sliders, adding an extra layer of deliciousness.
- Kid-Friendly: These small sandwiches are great for kids and adults alike, making them a hit for family meals.
Tools and Preparation
To prepare these Cheeseburger Sliders efficiently, you’ll need some essential kitchen tools. Having the right equipment can make cooking smoother and more enjoyable.
Essential Tools and Equipment
- Baking sheet
- Saute pan
- Whisk
- Wooden spoon
- Knife
Importance of Each Tool
- Baking sheet: A must-have for evenly baking your sliders without sticking.
- Saute pan: Perfect for browning the beef and vegetables while keeping all the flavors intact.
Ingredients
To make these mouthwatering Cheeseburger Sliders, gather the following ingredients:
For the Sliders
- 1 Tbsp. softened butter
- 1 Tbsp. olive oil
- 1/2 white onion, finely diced
- 1 lb. ground beef
- 2 cloves garlic, minced
- 1 Tbsp. yellow mustard
- 1 tsp. Worcestershire sauce
- 1/2 tsp. kosher salt
- pepper, to taste
- 1 pack dinner rolls (12 count)
- 16 slices American cheese
- 3 Tbsp. butter, melted
- pinch of salt and garlic powder
- 2 tsp. white sesame seeds
For the Burger Sauce
- 1/2 cup mayonnaise
- 1/4 cup ketchup
- 2 Tbsp. sweet pickle relish
- 2 tsp. sugar
- 1 tsp. distilled white vinegar
- salt and pepper, to taste
How to Make Cheeseburger Sliders
Step 1: Preheat the Oven
Preheat your oven to 350°F (175°C) so it’s hot enough when you put in your cheeseburger sliders.
Step 2: Prepare the Baking Sheet
Butter the bottom of a baking sheet with softened butter to prevent sticking.
Step 3: Sauté Onions and Beef
Heat olive oil in a medium-sized sauté pan over medium-high heat.
Add finely diced onions and sauté for about 3 minutes until they soften.
Add ground beef and cook for another 6–7 minutes until no longer pink. Drain any excess fat.
Step 4: Flavoring the Meat
Add minced garlic, Worcestershire sauce, yellow mustard, kosher salt, and pepper into the pan.
Stir these ingredients together for an additional minute to combine flavors.
Step 5: Assemble the Sliders
Slice dinner rolls in half horizontally.
Place the bottom halves on the prepared baking sheet.
Step 6: Cheese Layering
Whisk together melted butter with a pinch of salt and garlic powder.
Place 8 slices of cheese on the bottom half of the rolls.
Spoon the meat mixture on top of cheese.
Add remaining cheese slices over meat.
Step 7: Top It Off
Cover with top halves of buns.
Brush tops with melted butter mixture and sprinkle sesame seeds over them.
Step 8: Baking Time
Bake in preheated oven for about 12–15 minutes until warmed through and cheese is melted.
Keep an eye on them so they don’t brown too quickly; cover loosely with foil if necessary.
Step 9: Prepare Burger Sauce
While sliders are baking, whisk together mayonnaise, ketchup, sweet pickle relish, sugar, distilled white vinegar, salt, and pepper in a bowl until well combined.
Step 10: Serve
Once baked, you can brush with more melted butter if desired. Cut into individual sliders and serve warm with burger sauce on the side for dipping! Enjoy your delicious Cheeseburger Sliders!
How to Serve Cheeseburger Sliders
These delicious Cheeseburger Sliders are perfect for gatherings and can be served in a variety of ways to please your guests. Here are some creative serving suggestions that will elevate your slider experience.
Classic Presentation
- Serve the sliders on a large platter, neatly arranged with toothpicks for easy handling.
- Add a small bowl of extra burger sauce on the side for dipping.
With Fresh Veggies
- Include a side of crunchy carrot sticks and celery for a refreshing contrast.
- Slice up some pickles as an additional tangy option.
Pair with Chips
- Serve alongside crispy potato chips or tortilla chips for a satisfying crunch.
- Consider offering different flavors like BBQ or sour cream and onion.
Mini Burgers Bar
- Set up a toppings bar with options like lettuce, tomatoes, onions, and jalapeños.
- Let guests customize their sliders to suit their tastes.
Fun and Festive
- Garnish the platter with colorful cocktail umbrellas or decorative skewers.
- This adds a playful touch that’s sure to delight everyone at the party.
With Drinks
- Pair your sliders with cold beverages such as soda, lemonade, or even beer.
- Offer both alcoholic and non-alcoholic options to accommodate all guests.
How to Perfect Cheeseburger Sliders
To truly master the art of making Cheeseburger Sliders, follow these handy tips. They’ll help you achieve the best flavor and texture in each bite.
- Use Quality Ingredients: Opt for fresh ground beef and good-quality cheese to enhance overall taste.
- Don’t Overcook: Keep an eye on the cooking time; sliders should be juicy, not dry.
- Layer Wisely: Stack ingredients thoughtfully; this ensures every bite has balanced flavors.
- Experiment with Sauces: Feel free to try different sauces like barbecue or spicy mayo for added zest.
- Keep Them Warm: If serving later, cover the sliders with foil after baking to retain warmth and moisture.
Best Side Dishes for Cheeseburger Sliders
Cheeseburger Sliders pair wonderfully with various side dishes that complement their rich flavors. Here’s a list of great options to consider for your next gathering.
- French Fries: Crispy, golden fries are a classic choice that everyone loves. Serve them with ketchup for dipping.
- Onion Rings: These crunchy rings add extra flavor and texture. They can be baked or fried for a delicious treat.
- Coleslaw: A creamy coleslaw provides a cool contrast to the warm sliders. It’s refreshing and adds crunch.
- Potato Salad: A classic picnic dish that offers creaminess and pairs well with any savory meal.
- Corn on the Cob: Grilled or boiled corn brushed with butter makes for a sweet side that balances out the savory sliders.
- Baked Beans: Sweet and smoky baked beans provide hearty comfort food alongside your sliders, making it even more filling.
- Fruit Salad: A light fruit salad can cleanse the palate and add a sweet finish to your meal.
- Pickle Platter: Offer an assortment of pickles—dill, sweet, or spicy—for those who love tangy bites with their burgers.
Common Mistakes to Avoid
Making Cheeseburger Sliders can be a delightful experience, but there are a few common pitfalls to watch out for.
- Skipping the seasoning: Failing to season the ground beef can lead to bland sliders. Always remember to add salt and pepper for flavor.
- Overcooking the beef: Cooking the meat too long can make it dry. Remove it from heat as soon as it’s no longer pink.
- Not using enough cheese: Insufficient cheese results in less gooeyness. Ensure you layer enough cheese on both sides of the meat.
- Neglecting bun preparation: Skipping the butter or garlic powder on the buns may lead to a dry texture. Brush them generously for added flavor.
- Ignoring oven temperature: Baking at too high a temperature can burn the tops. Keep an eye on them and adjust as needed.
Storage & Reheating Instructions
Refrigerator Storage
- Store cheeseburger sliders in an airtight container.
- They will last up to 3 days in the fridge.
Freezing Cheeseburger Sliders
- Wrap sliders individually in plastic wrap or foil.
- Place in a freezer-safe bag, and they can be frozen for up to 2 months.
Reheating Cheeseburger Sliders
- Oven: Preheat to 350°F and cover with foil. Bake for about 10-15 minutes until heated through.
- Microwave: Heat sliders on a microwave-safe plate for 30-60 seconds, checking frequently.
- Stovetop: Heat in a skillet over medium heat, flipping occasionally until warm.
Frequently Asked Questions
Here are some common questions about making Cheeseburger Sliders.
How many Cheeseburger Sliders does this recipe make?
This recipe yields 12 delicious cheeseburger sliders, perfect for sharing!
Can I customize my Cheeseburger Sliders?
Absolutely! Feel free to add toppings like pickles, tomatoes, or bacon according to your preference.
What is the best way to serve Cheeseburger Sliders?
Serve these sliders warm with your favorite dipping sauces like ketchup or homemade burger sauce for extra flavor.
How do I store leftover Cheeseburger Sliders?
Leftover sliders should be stored in an airtight container in the refrigerator for up to 3 days.
Final Thoughts
Cheeseburger Sliders are a fantastic choice for gatherings, game days, or any casual party. Their easy preparation and customizable nature make them irresistible. Try adding different toppings or sauces to suit your taste!
Cheeseburger Sliders
- Total Time: 25 minutes
- Yield: 12 servings 1x
Description
Indulge in the ultimate comfort food with these Cheeseburger Sliders! Perfect for any gathering, these mini burgers are a delicious blend of juicy ground beef and melted American cheese, all nestled between soft dinner rolls. Whether it’s game day, a birthday bash, or just a casual get-together, these sliders are sure to be a hit. Easy to make and customizable, they can be topped with your favorite condiments and served with savory dipping sauces for an unforgettable appetizer experience. Enjoy the warm, cheesy goodness that will have your guests coming back for seconds!
Ingredients
- 1 Tbsp. softened butter
- 1 Tbsp. olive oil
- 1/2 white onion, finely diced
- 1 lb. ground beef
- 2 cloves garlic, minced
- 1 Tbsp. yellow mustard
- 1 tsp. Worcestershire sauce
- 1/2 tsp. kosher salt
- pepper, to taste
- 1 pack dinner rolls (12 count)
- 16 slices American cheese
- 3 Tbsp. butter, melted
- pinch of salt and garlic powder
- 2 tsp. white sesame seeds
- 1/2 cup mayonnaise
- 1/4 cup ketchup
- 2 Tbsp. sweet pickle relish
- 2 tsp. sugar
- 1 tsp. distilled white vinegar
- salt and pepper, to taste
Instructions
- Preheat the oven to 350°F (175°C).
- Butter a baking sheet and sauté onions in olive oil until soft.
- Add ground beef, garlic, Worcestershire sauce, mustard, salt, and pepper; cook until beef is browned.
- Slice dinner rolls and layer cheese on the bottom halves.
- Spoon meat mixture over cheese; top with more cheese and cover with roll tops.
- Brush tops with melted butter mixed with garlic powder and sprinkle sesame seeds.
- Bake for 12–15 minutes until cheese is melted.
- Prepare burger sauce by mixing mayonnaise, ketchup, relish, sugar, vinegar, salt, and pepper.
- Serve sliders warm with burger sauce on the side.
- Prep Time: 10 minutes
- Cook Time: 15 minutes
- Category: Appetizer
- Method: Baking
- Cuisine: American
Nutrition
- Serving Size: 1 slider (85g)
- Calories: 250
- Sugar: 2g
- Sodium: 480mg
- Fat: 14g
- Saturated Fat: 7g
- Unsaturated Fat: 6g
- Trans Fat: 0g
- Carbohydrates: 20g
- Fiber: 1g
- Protein: 10g
- Cholesterol: 35mg

